Thursday, November 19, 2015

Planning to plan...

I don't know about you, but I've never really been successful with using a planner.  The closest I ever came was when my kids were in Jr. High and High School, and I taped a regular calendar on the inside of the kitchen cabinet nearest the phone.  Anything that went in my purse or on my desk, though, was abandoned pretty quickly, partly because it was never where *I* was at the time, either to check it or to write in it.

As a result, most of my organizational method (ha) over the last decade or so has been the sticky note version.  And they are everywhere.  On my desk, under my desk, in my purse, in jeans pockets, in my car... where I've been, you can probably find a sticky note, a scrap of paper, or the back of a grocery receipt with some scribbled notes and lists.

With this sort of history, it's a bit of a surprise that when Maya from Scrapbookgraphics.com showed us her new "artful" planner project on a Periscope broadcast (you can read about it HERE - the video is at the end of the post), I fell in love with the concept of making my own planner inserts to the point where I am actually going to give the whole system a whirl.  Will I succeed?  Who knows, but since it involves creating pretty pages I figure I have nothing to lose!  (Plus, I do have a love affair with office supplies, and getting new binders and whatnot isn't exactly a hardship, either!) To be honest, it was Maya's addition of little scrap pages amongst the actually planning pages that appealed.  I may never be very good with the actual appointment book aspect, but I love the little binder of daily memories that I envision coming out of this!

I chose to use a half-letter size setup, with a mini binder I found at Wal Mart.  For this to work, I figure I needed to be free to assemble whatever I felt like at the moment instead of planning it all out beforehand, so a looseleaf binder system seemed like the right choice.  I chose the smaller size because I don't have a lot of deskspace and if it is going to have half a chance of being useful, I need to have it out where I can see it.  And I want control over the decorating myself, so being able to print two sheets per page of paper (with minimal cutting, LOL) seemed important too.

After that, all I needed was a template to fit the page size I would need, and some fun with my own digi supplies!  Here's the first one I made (it's for next week, because apparently this week was too soon to plan in my head).  It's ok, I'm not sure I quite had the hang of it (reminded me of my early days of scrapping, it takes some time to find your comfort zone, and what you like and what works and what doesn't).


With the first one out of the way (and nicely cut and punched and in the binder - so official, even though I only wrote one thing on it, LOL), I thought some more and decided to try one for the current week, using a current kit that I love (Autumn Masquerade, which I think I have used more than almost any kit I've made).  And then after I put those pages together, I grabbed some photos from my daughters in our facebook family chat, and created the mini layout with those.  It was so much fun, and I loved being able to just print it out (on the back of the calendar page, because I was being thrifty and organized and all that).  And since there is never a shortage of back and forth in this chat, I know I will have fun little things to document even on the weeks where I never write down a single appointment or list.


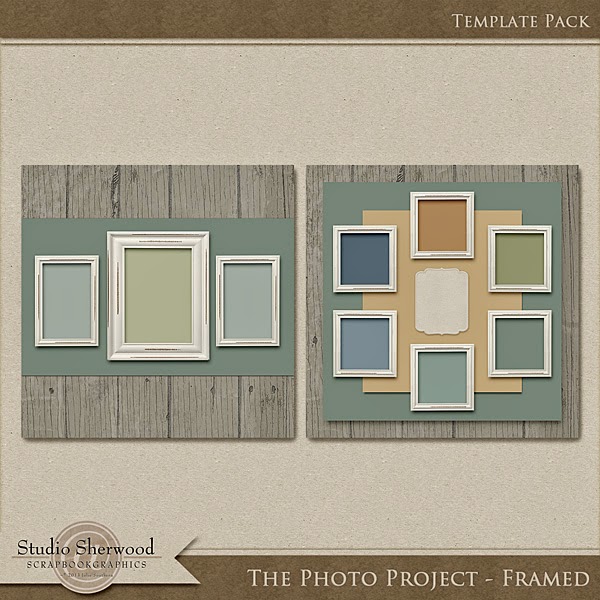
And in case there are others out there who wish to take a little spin with this project as well (or some of you who are already dedicated planners but have never created your own pages), I packaged up my templates and put them in my shop.


I also created another set with a different configuration for the days; it has some fun accessories with it, too.  


Not only does this appeal to the part of me that loves control, and the part that gets bored with the same old same old, and the part of me that loves to create and personalize... but think of using all those fun kits that you have in your stash once more!  I can have a different look every week and enjoy them all over again!

One of my CT member asked for a set of digital stickers to use in her planner pages, so I made this set for her.  Easy to use as png files, but I've included a printable jpg file too, in case you are handier than I am with the scissors and glue stick and want to use them that way.  It's my celebratory gift to you!

You can download them HERE

The Planner goodies will all be available at the introductory sales price for a limited time in my Scrapbookgraphics shop, so grab yours and get yourself ready to be incredibly organized in no time flat :)

Maya has also started a private facebook group called the Artful Planner Club.  If you want to find out more about creating your first planner, or if you already create digital pages for your planning system, or if you just want to see what everyone is talking about, you can request membership here. It has been so much fun to see everyone's ideas in action, and I have learned a lot.

Enjoy!

~Julie


Monday, June 15, 2015

Father's Day is nearly upon us... commence panic.

I don't know about you, but holidays tend to sneak up on me - I think, "Oh, I have lots of time," and I do, and then... I don't.

I've put together a few ideas for you for Father's Day - both making cards and scrapping the event, in case it just sneaks past you and all you have is photos and a desire to at least record those :)

And to make things a little easier, I have some guy kits on sale for the rest of the week.  We can do this!

First the inspiration:

Card ideas - choose a masculine kit and create your own scene:


Or choose a photo that is special to you and use word art to create the sentiment:


Masculine Layout Ideas - choose a kit with neutral elements & papers - it doesn't have to be just for guys!

 (Layout by Poki)

 Both of these layouts use In His Garage (which I first made to scrap photos of my handy husband)  I still find the tools incredibly fun to use in a layout.  Ironically, my husband is buying MORE tools in this particular photo... I will have to make another kit, I guess, LOL.

Here's an example of a layout done with a reasonably neutral kit that looks girly at first glance (Miss Mary Mack).  There were a lot of dark neutrals included, though, so look for those in the kits in your stash!

Another example using a largely pastel kit - I just kept the neutrals for this layout of my son-in-law and his dog, Leo (kit is Joy Bundle)

This was scrapped using a Christmas kit - I just used the bits I wanted :)  (God Rest Ye Merry, Gentlemen)


If Flowers aren't your jam on a masculine layout, you could substitute geometric shapes or flair in this instance.  (Scrapped by Lexy using Life Story - Summer)

Here's a whole list of suggestions to replace flowers on a masculine layout (contributed by readers of my Facebook page):

military ribbons or pins
metallic flowers
pleated ribbon flowers
newspaper bits
stars
octagons
flair
zipper flowers
round tags
gears
splatters
brads
screws
wire
mesh
tickets
hats or caps
crowns
balloons
pleated paper circles/medallions
buttons
clocks/watches
coiled strip/rope
leaves
wood chips
sunbursts
cars
tools
wheels
frogs, snakes, lizards
dinosaurs
arrows
hexagons
chunky arrows
leather buttons
tie tacks or bars
rivets
burlap flower

Product suggestions:

Here's a helpful set of greetings all set to go - make card-making a snap!


There you go - I hope this gives you some ideas of your own for Father's Day and scrapping your favorite fella!  And to make it even more pain-free, you will find them all on sale through the weekend!


Friday, May 15, 2015

The Photo Project - Framed & Network. Have Fun with your Photos!

My Photo Project line was born out of a desire to scrap multiple photos, and to do it in a fun, fast, and effective manner.  Sometimes the templates are pretty straightforward.  Like this set:


This dignified gallery-style template set features shabby white frames and will help you scrap a series of photos quickly and effectively, and look rich and lovely with a minimum of effort.  Or you can get fancy and add in lots of doodads and pretties if you have the time and inclination.

Other times, it's fun to do something wild and crazy and different.  Like this set:


Again, you really can get by with just putting photos in the spots (you don't even have to use all of them, some can just have a paper clipped to them, or journaling) and a nice background paper, and you will have a striking collage in minutes.  Or add elements and stir for something extra-special!

My team created some awesome examples for you.  I am so grateful that they embrace my photo-obsessed templates :)

Layout by Poki - love the clever way she used One Large Photo over all of the spots!

 Layout by ... well, me :)  I have oodles of pix of the grandpets!

 Layout by Maria - Love her color choices!

 Layout by  Anita - isn't this elegant?

 Layout by Poki - girl loves flowers & butterflies!

 Layout by Maria - so dramatic and lovely!

 Layout by Anita.  Just, Awwww.

Layout by Jenni - so elegant and lovely!

So as you can see, many moods, many looks, all fab!  Both sets are in my shop today at the introductory sale price, so grab your photos and get your scrap on this weekend!

I also have new CU in my shop - great for designers, but useful for scrappers, too.  And you can count on them being at the level of quality I expect for my kits.


You can use the coupon code TENMORE to save an additional ten percent off the sale price through May 21.  Happy scrapping, and see you next time!

Monday, May 4, 2015

Winners!

Time to announce the Photo Project template winners!  Thanks so much for playing along :)
Here is the list of the entries:

1. Marcia
2. Ginger
3.CatSlater
4.Shawna Wakeley
5.Debbie Phelps
6.catschwartz
7.SharonB
8.markysmom
9.Cheryl
10.JulesW
11.Наталья
12.Anonymous (Katia)
13.Paivi.eerola
14. Mary Chapman
15.Anonymous
16.Brenda Hollingsworth
17. PattiD


Random.org picked 6,4, and 11!  Congrats to you - send me an email at TheSherwoodStudio (at) gmail (dot) com and I will send you your code :)

Post-iNSD weekend blues... let's win something!

I don't know about you, but so much effort and thought goes into a big celebration weekend that it leaves me feeling a little lost when it winds down.  I figured I would fix that today with a fun little win-your-fave giveaway.

Here's your assignment, should you choose to accept it (nice dramatic effect there, right?  Not bad for Monday morning, anyway).  Take a hop, skip, and a jump through my Photo Project Template shop, and pick out your fave.  Post it here on the blog in the comments (just the name is enough).  I will come back tonight and grant three lucky winners their wish :)  Easy Peasy!

Here are a few samples, if your day is too busy to go shopping:


 That's just a taste - there are many more!  Have fun picking your fave and I'll be back later!


Saturday, May 2, 2015

iNSD Gift


Happy interNational Scrapbooking Day! Hope you are busy unzipping goodies and getting in a little scrapping time today smile emoticon

As a special thank you from me, for the next 8 hours you can use code NSDHAPPY to receive the new Family Tree 2 Photo Cluster template FREE! http://bit.ly/phototree2


Enjoy!  I'd love to see what you do with it in the Studio Sherwood Scrapbookgraphics gallery!

Thursday, April 30, 2015

iNSD, New Releases, & a Sale!

Happy (inter)National Scrapbooking Day!!
Well, you know how we do it around scrappy town. We celebrate days of iNDS. That is exactly what we are doing today. There is so much to tell & show you. So, with that being said, we are going to jump right into what is new with Studio Sherwood. I know what you want to know...SALE!

That's right. From today through Tuesday you can get all your favorite & wish listed Studio Sherwood items for 45% off. You don't even have to fiddle with a coupon! Make sure you head over to the store and get all those items before the sale expires. Here is a glimpse of what is in the store. Her new releases for this week.


Julie has always been intrigued by ghost towns and antiquities, and that fascination has recently been reawakened. She needed a shabby kit with an antique feel to scrap her photos, and Bygone Days was the result - just the right touch of color, but not so saturated that it distracts from the photos. Here is what Julie's talented creative team scrapped with this lovely kit. Also, you can get the solid papers & additional patterned papers separate. If you are a paper junkie, like myself.


That isn't all that is new with Studio Sherwood this week. You know those amazing templates that you can only get from Studio Sherwood?! Those templates that are not like any others out there. The ones that make your pages stand out in the gallery and make you ooh and aah when you see them in your books?! I have 4...count it...FOUR new templates to show you. Get ready to get your socks knocked off!


A set of three full page photo tray templates - use them alone, or dress them up with embellishments!


A set of four full page clustered templates - use them alone, or dress them up with embellishments! Four full-page clusters included, with optional photo edges.


Another Family Tree template option, since I had so much fun with the first Family Tree template! Contains chipboard tree, frame, Family title and 10 separate photo spots with optional frames in PNG, TIF, and PSD. .page files are available in a separate download. (Page files converted by Jennifer Little)

These are my favorite! They are so different than anything I've seen out in scrappy town. Not scary different though. Really pretty and brings everything together nicely. Julie has always been fascinated by the photo trays you can use with paper scrapbooking supplies, so she thought it would be fun to have a digital version (since she's not great with scissors and paste). This Template pack contains three elegantly-shaped photo tray templates with lots of niches and shelves to decorate to your heart's content! Included in TIF, PSD, and PNG formats. Three variations of frame - painted black, chipboard, or wood veneer. Or clip your favorite paper to the frame for variety!

Whew. So much newness! I am worn out & iNSD is just getting started.  Make sure you get these & more of your wish listed Studio Sherwood items before the sale is over. Happy iNSD everyone!

P.S. - there's a little matching freebie to go along with Bygone Days... you can download it HERE!