Thursday, May 18, 2017

Use all the photos...

This week a favorite set of templates returns to my shop, except they have had an overhaul and are now dressed to the nines for your scrapping convenience:


I've used these templates many times .  I've mentioned my proclivity for taking lots of pictures of essentially the same thing, LOL, and being unable to weed out a lot of them because they each show something a little different, and I want to tell the whole story of the event or place I'm featuring on my page.  That generally means a lot of photo spots necessary, and was the principle behind my entire photo cluster line - I hate having to figure out the photo spots when I start scrapping.  Embellishing has never been a problem for me, so I was happy with the photo spots.

However.

Feedback from friends and creative team members indicates that not everyone deletes all the embellishments from a template when they sit down to scrap, LOL.  So when I decided to bring this set back, I tried to keep that in mind and I added suggestions for embellishments for those who prefer them.  Confession:  I'll still delete them all when I use them ;)  I've also added the alpha for my TITLE spots as an added convenience.


I'm always inspired by the Creative team ladies:


I've also added more items in my -Attic Treasures- category:


Classic kits, bargain priced! You can see some of them in action in the Creative team examples.  These are kits I turn to over and over for my own scrapping needs, and I wanted to keep them available for you as well.


That's it for this week - you can  visit my shop HERE, and until next time, happy scrapping!

Julie

Wednesday, May 17, 2017

Happy iNSD a little early ;) Wanna celebrate with us?

I love iNSD.  Sales, scrapping activities, and the best part - freebies!  The designers at The Digichick have been hard at work behind the scenes to help you commemorate our love for our hobby, so we've created a collaborative kit called (appropriately, LOL) "Memorykeeper."  Beautiful colors and sentiment, right?  Some of you may have already begun the train and arrived here from Erika's (et Designs) blog; others might just now be jumping in.  Never fear, if you get lost you can always pop back to the TDC forum for the master list :)

On to business - here's my portion of the kit.  I fell in love with this palette (so much so that I made a whole coordinating bundle of my own, more of that down below), and I hope you enjoy using it! You can download it HERE.

http://bit.ly/2pF0lN8


 I have lots of new goodies in the shop for you, both CU and personal use (I can't bring myself to write PU, LOL).

 Love these colors!  It's soft and pretty and yet rich and deep all at the same time.  Ok, maybe it's because that brown definitely looks like chocolate, I dunno.  There are matching bits and pieces, and of course bundled together to make a $$$ saving collection:

I think the distressed gradient papers are my favorites, I can hardly wait to finish all my chores so I can go scrap with them ;)

New CU products, too.  I've been working on building up my stash of basics, lately.  The bonus part is that all these new CU products are going to be in the Chick Blitz, so they are only $2 each!  Love a bargain, I do.

http://www.thedigichick.com/shop/Sherwood-Studio-CU/

And last of all, we have a new product section at The Digichick - it's called Attic Treasures.  There you will find some of our classic products that aren't brand new, but have enduring value and are often requested by customers.  I've added some of my favorite products there, so dig around in the shadows and see what hidden treasure you might find ;)  The best part is that they have all been permanently marked down to a bargain price!

http://www.thedigichick.com/shop/Attic-Treasures-Sherwood-Studio/ 

And everything else is on sale!

Enough from me - enjoy!


Sunday, May 7, 2017

She who can't cut straight does a hybrid project and lives to tell about it. You can, too!


 I had the opportunity to do a little project recently and I wanted to share it with you.  For someone who has never done particularly well with cutting and pasting (thus the digital scrapbooking), I've recently come to love playing with my own creations.

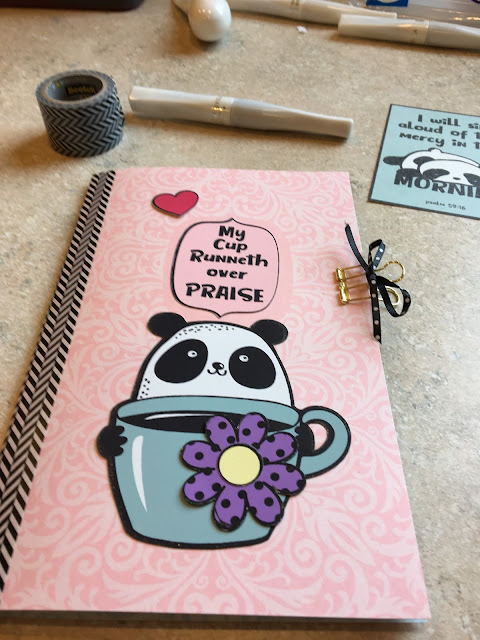
Here's what I made:


It's a little booklet for jotting down praise reports or a gratitude journal.  I purchased a bundle of graphics, and the cute pandas were part of it.  It's not really my design style, but I have a daughter who loves pandas, so I thought I would make her something personal for her birthday.  (I might add that this was necessary because I sent her the big present early and I was so excited about it that I made her open it as soon as it got there... which was fun at the time but leaves the birth DAY rather empty, y'know?)

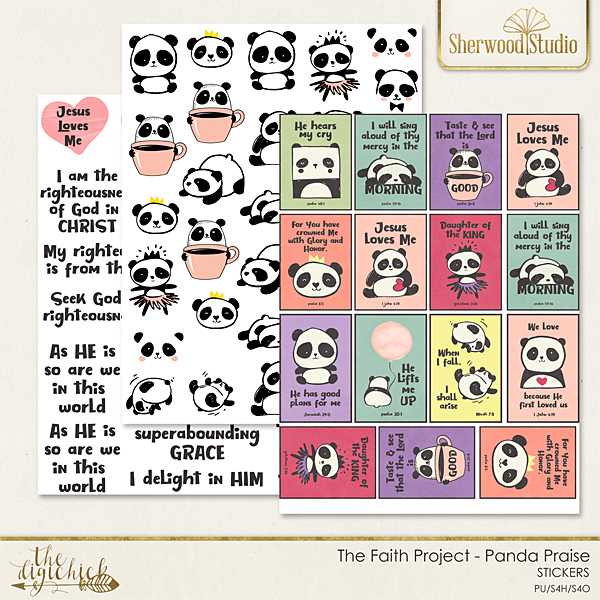
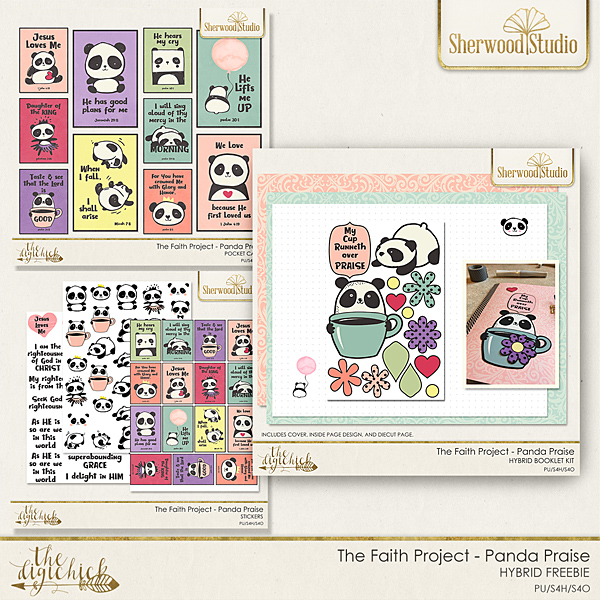
I'll show you some step-by-step photos in a minute (it isn't hard, I mean... *I* did it, and without directions LOL) but here are the other pieces I made to go with it:

 4x6 cards

 Stickers (I printed them on a clear label and then kiss-cut them on my Cricut)

 My own "die-cut" pieces to decorate the covers


 3x4 pocket cards     ^^ as you can see, I at least got help cutting straight ;)

So here's the booklet:

Score the cover (I just printed scrapbook paper on both sides of letter-size white cardstock)

I printed some lightly dotted printer paper with little decorations for inside pages, and trimmed about a quarter of an inch off each side.  I scored and folded each one then put them together in the center of my cover, then opened up my stapler and stapled 3 times down the center (I stapled into a big cork coaster I have)


Fold the staples down, carefully.  Bleeding on one's project is never recommended ;)


Cover the seam with a nice wide swath of washi tape.  I like this one because it's wide, but you could layer skinnier ones.  It's just to protect that spine and hide the staples :)


 Glue on your pretties :)  This is where I am afraid I lack skill - I never quite know what to use to glue stuff together.  In this case I used a glue stick, which worked fine.


And there you have it!  

I've packaged up all the goodies to make the booklet for you, so you can have a go and feel all proud of yourself as I did ;)  If you don't have a cutting machine, die cuts are pretty simple to cut out (especially if you cut better than my 5-year-old equivalent skillz). 

So here you go - Click on the link below to download your very own project!

http://bit.ly/2pog3tb

http://bit.ly/2pog3tbhttp://bit.ly/2pog3tb

http://bit.ly/2pog3tb